 As another year winds down, we hope you’ve managed to schedule some time off
over the holiday period. To offer a little extra peace of mind while you’re away from the
brewery, we’ve compiled a quick checklist to help ensure your liquid yeast remains
viable over the break and ready to ferment in the New Year. Here are some best practices to follow: 1. Check Yeast Health Before Storing: Before planning for storage, ensure that
your yeast is in good condition. This means it should be free of contamination and at a
viable cell count. If the yeast is nearing the end of its shelf life or shows signs of poor
health (e.g., off smells, discolouration), it’s unlikely it’ll be much use to you after a period
of storage. 2. Refrigeration: The most effective way to store liquid yeast is in a refrigerator or
cold room. The cold temperature slows down the yeast’s metabolism, reducing the rate
at which it ages and uses up its energy reserves. Ideally, store the yeast at
temperatures between 0.5°C to 3.3°C. 3. Clean and Sanitary Containers: Transfer the yeast to a sanitised container
which ensures that your yeast is not contaminated. Yeast brinks or modified kegs that
have been thoroughly cleaned and sterilised are suitable for storing your yeast. If this is
not an option we suggest using our Clean Repitching System (see pic below), which consists of collapsed and sterilised cubitainers and a specially designed connector hose.
As another year winds down, we hope you’ve managed to schedule some time off
over the holiday period. To offer a little extra peace of mind while you’re away from the
brewery, we’ve compiled a quick checklist to help ensure your liquid yeast remains
viable over the break and ready to ferment in the New Year. Here are some best practices to follow: 1. Check Yeast Health Before Storing: Before planning for storage, ensure that
your yeast is in good condition. This means it should be free of contamination and at a
viable cell count. If the yeast is nearing the end of its shelf life or shows signs of poor
health (e.g., off smells, discolouration), it’s unlikely it’ll be much use to you after a period
of storage. 2. Refrigeration: The most effective way to store liquid yeast is in a refrigerator or
cold room. The cold temperature slows down the yeast’s metabolism, reducing the rate
at which it ages and uses up its energy reserves. Ideally, store the yeast at
temperatures between 0.5°C to 3.3°C. 3. Clean and Sanitary Containers: Transfer the yeast to a sanitised container
which ensures that your yeast is not contaminated. Yeast brinks or modified kegs that
have been thoroughly cleaned and sterilised are suitable for storing your yeast. If this is
not an option we suggest using our Clean Repitching System (see pic below), which consists of collapsed and sterilised cubitainers and a specially designed connector hose. 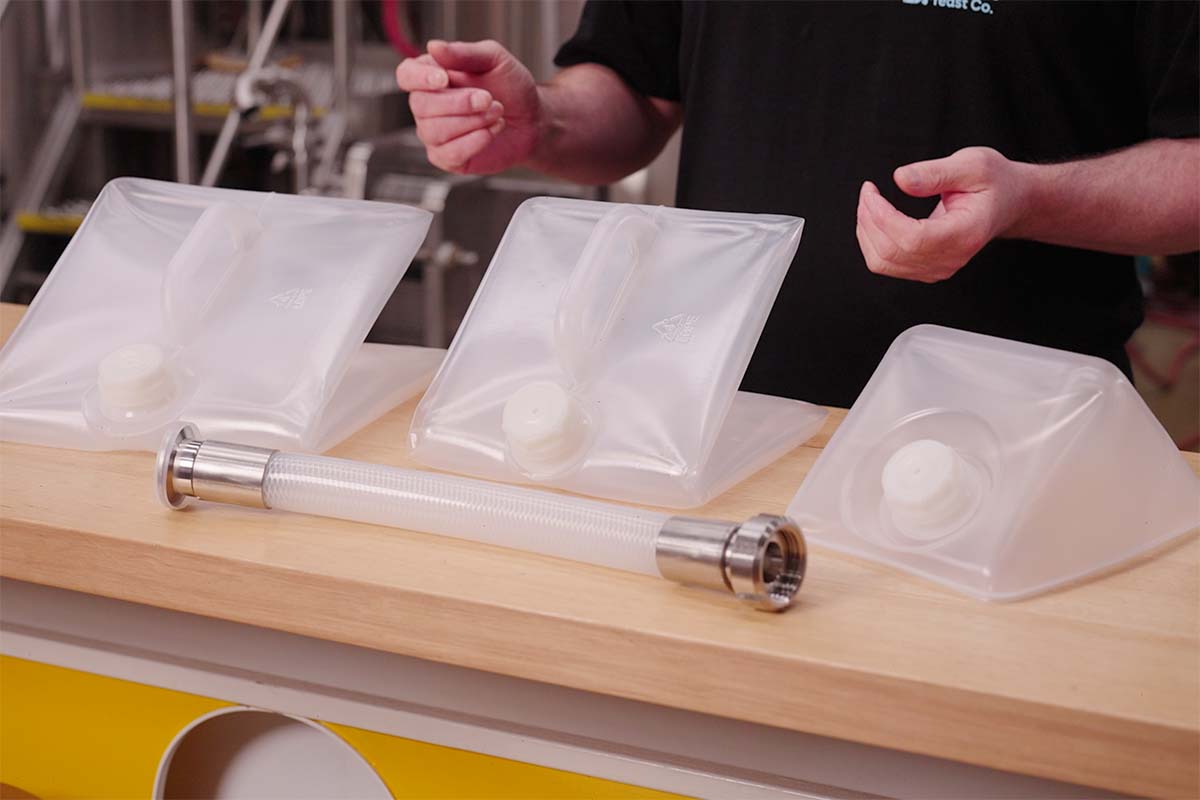 4. Avoid Freezing: While cold temperatures are good, freezing liquid yeast can
damage the cells. If yeast freezes, its viability can significantly decrease, resulting in
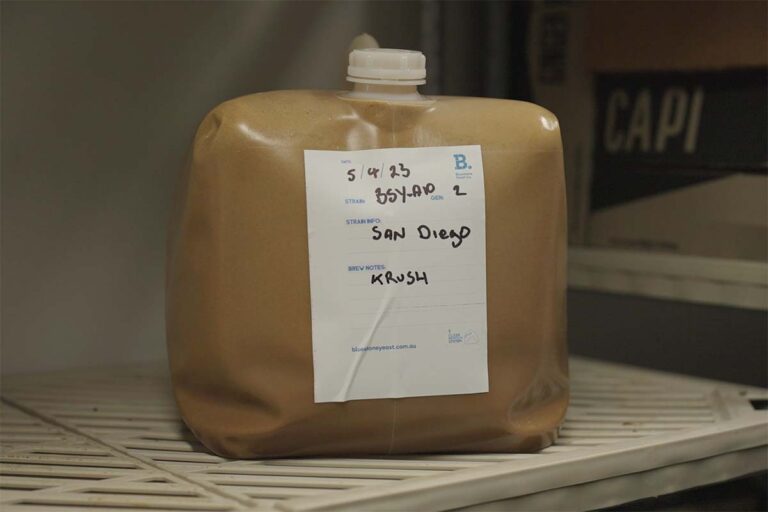
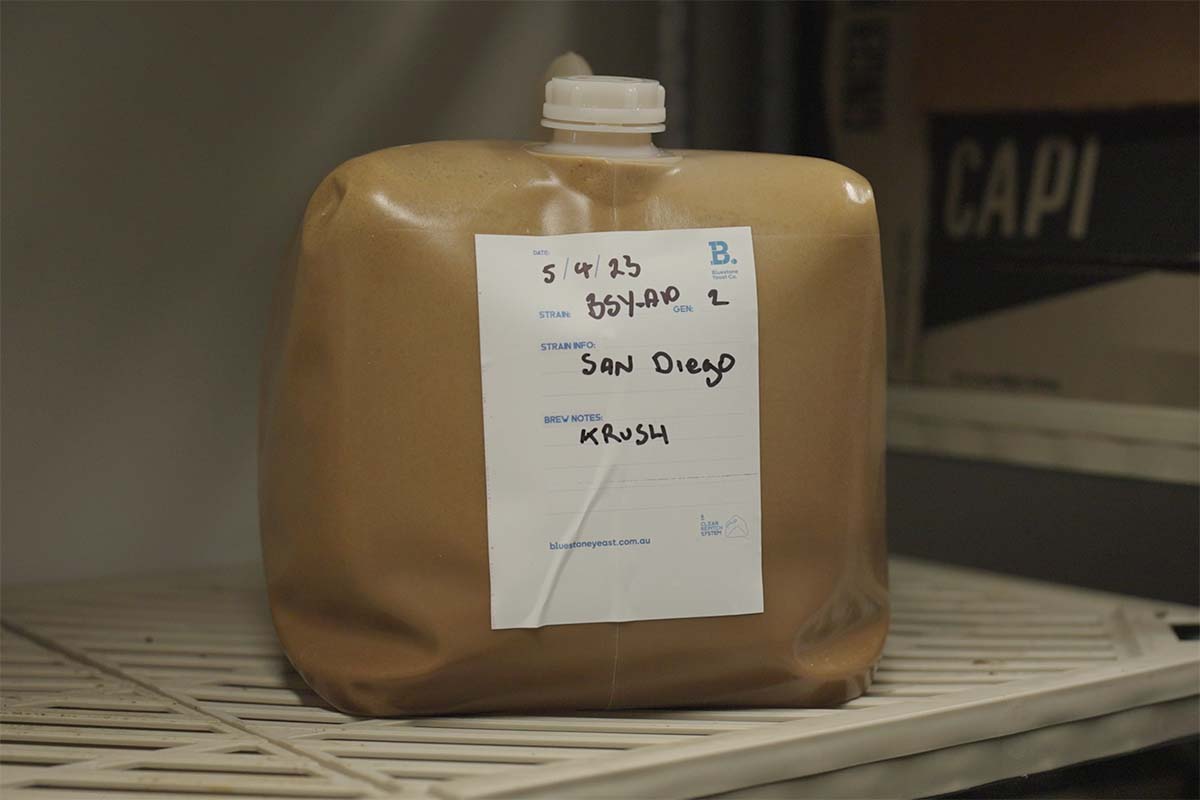
poor fermentation performance later. 5. Label and Date: Clearly label the yeast with the strain type and the date of storage.
This practice helps in keeping track of the yeast’s age and ensures you don’t use yeast
that has been stored for too long. 6. Feeding Before Storage (Optional): For longer-term storage (greater than 2
weeks), it can be useful to feed the yeast with a small amount of sterile wort or a yeast
nutrient mix. This step can help the yeast maintain better health over the storage period. However, the yeast will produce CO2 over time and this will require a storage vessel that can release the CO2. 7. Checking Viability Before Use: Upon returning from holiday, check the yeast’s
viability and health. This can be done through a starter culture to ensure it is still active.
If the starter culture shows poor activity, it may be safer to use a new yeast batch. Remember, the viability of yeast decreases over time, so even with the best storage
practices, it’s ideal to use stored yeast as soon as possible after your return. This
approach ensures the best fermentation results for your brew. A good option is to do a
2HL propagation step to help the yeast recover and build up the best starting population for the first brew of the year. If this all sounds too stressful, then book in a fresh yeast pitch for the start of January. We currently have 20+ breweries that have scheduled deliveries for the first week of the New Year. So, if you are planning to start 2024 with the best live liquid yeast in the country, drop us a line and we will get your 2024 off to a flying start!
View our Strains
--- Want to talk yeast? Browse our strain catalogue, explore our Nutrient Booster range, or get in touch to discuss your brewery’s needs.
4. Avoid Freezing: While cold temperatures are good, freezing liquid yeast can
damage the cells. If yeast freezes, its viability can significantly decrease, resulting in
poor fermentation performance later. 5. Label and Date: Clearly label the yeast with the strain type and the date of storage.
This practice helps in keeping track of the yeast’s age and ensures you don’t use yeast
that has been stored for too long. 6. Feeding Before Storage (Optional): For longer-term storage (greater than 2
weeks), it can be useful to feed the yeast with a small amount of sterile wort or a yeast
nutrient mix. This step can help the yeast maintain better health over the storage period. However, the yeast will produce CO2 over time and this will require a storage vessel that can release the CO2. 7. Checking Viability Before Use: Upon returning from holiday, check the yeast’s
viability and health. This can be done through a starter culture to ensure it is still active.
If the starter culture shows poor activity, it may be safer to use a new yeast batch. Remember, the viability of yeast decreases over time, so even with the best storage
practices, it’s ideal to use stored yeast as soon as possible after your return. This
approach ensures the best fermentation results for your brew. A good option is to do a
2HL propagation step to help the yeast recover and build up the best starting population for the first brew of the year. If this all sounds too stressful, then book in a fresh yeast pitch for the start of January. We currently have 20+ breweries that have scheduled deliveries for the first week of the New Year. So, if you are planning to start 2024 with the best live liquid yeast in the country, drop us a line and we will get your 2024 off to a flying start!
View our Strains
--- Want to talk yeast? Browse our strain catalogue, explore our Nutrient Booster range, or get in touch to discuss your brewery’s needs.
Ready to improve your fermentation performance?
Talk to us about zinc supplementation, nutrient programmes, or yeast management for your brewery.